

Windows 10 How To Limit Cpu Usage
Keeping an eye on the usage of your CPU is pretty useful. This is because if your CPU is beingness overloaded, it can stop upward throttling which can atomic number 82 to bad performance of your PC overall. Equally it turns out, this can significantly impact the day to day tasks that you perform on your estimator. Every bit such, yous have to make certain that no programme, which isn't really of import or running in the background, is taking away almost of your CPU resource. In this commodity, nosotros are going to evidence you dissimilar methods using which you can counter programs that might be using more CPU than they should.
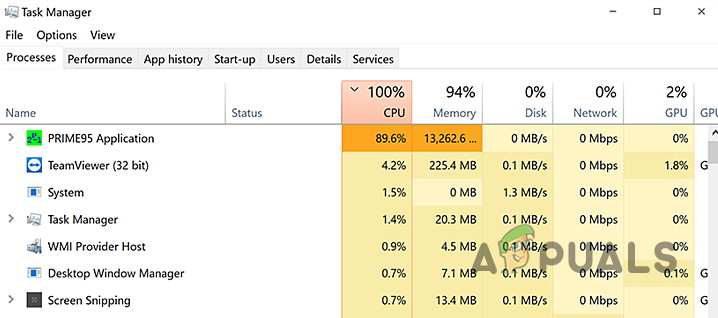
Equally it turns out, your CPU is ane of the most important components on your computer. In that location are several programs out at that place that can be actually resource-hungry and endeavour to take over whatever is available to them. This, as we have mentioned, can accept negative impacts on the performance of your computer. No matter what you are doing, be it gaming or simply web browsing, if the task that yous are doing does non accept sufficient resource available, it won't exist able to run smoothly. Equally such, optimizing your PC for better operation is always crucial.
At present, there is no straight way in Windows that lets y'all command the CPU usage for unlike programs using a pct or something like. Rather, what we do have is full general options that can be accessed using the Task Director to decide how much CPU is available for a certain process. In addition to that, you can too use a third-party utility to command the CPU usage of a process or program. With that said, without farther ado, let us get started and show you how to limit the CPU usage of a program.
Modify Process Priority
Equally it turns out, the commencement option available to yous is to alter the priority of the program that is using more than resource than it should. Now, changing the priority of a process is not a directly approach to limiting its CPU usage, however, what it does is it lowers the priority of the process and thus it is allowed less CPU time by the CPU Scheduler.
Whenever a program is to be executed, it is allocated a sure corporeality of CPU fourth dimension before it is put in the waiting land again past the scheduler and then that other processes tin use your CPU. The priority of a process is an of import gene when deciding the CPU time. As such, changing the priority of a procedure can change how much fourth dimension information technology is allowed on the processor. To alter the priority of a program, follow the instructions down below:
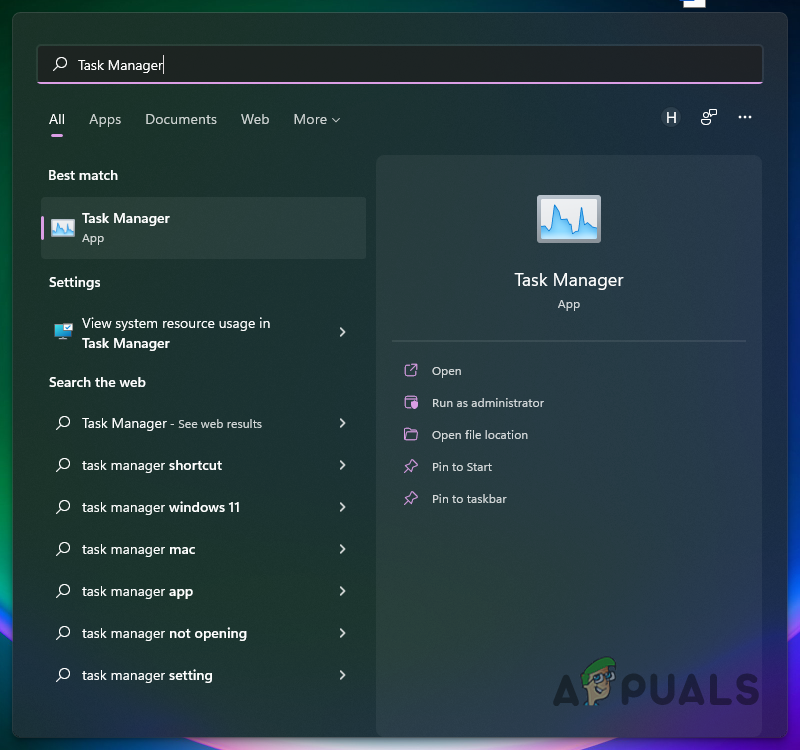
- First of all, open the Chore Director. You lot can practice this past searching for Task Manager in the Beginning Carte du jour.
Opening up Task Manager - Once the Task Director window is open, switch to the Details tab.
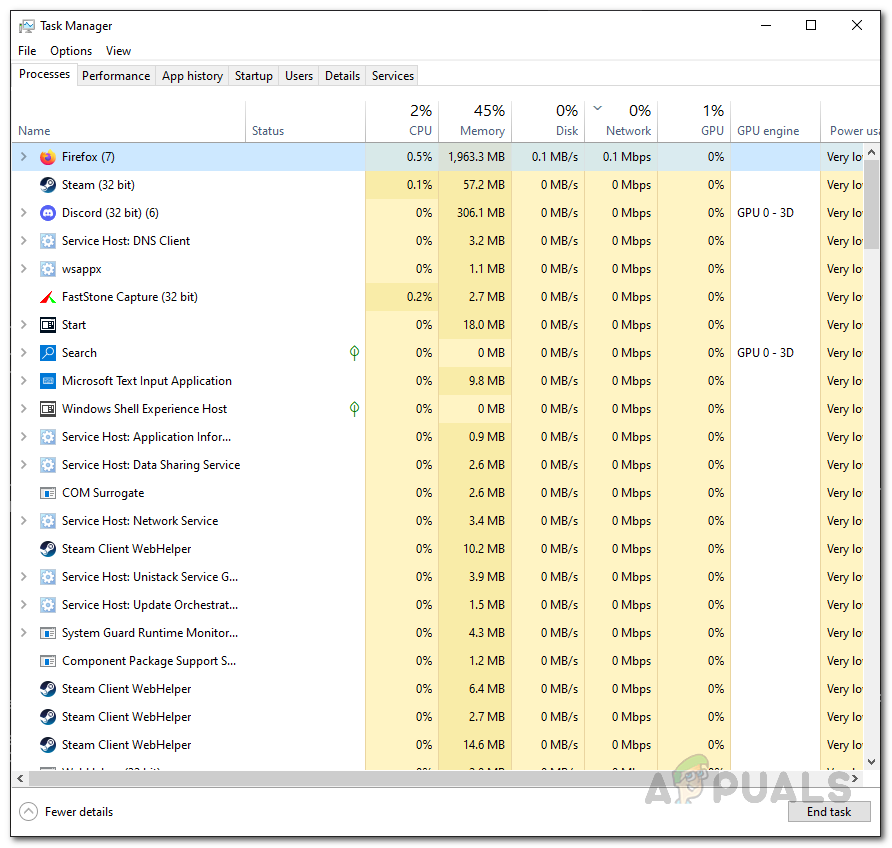
Task Managing director - On the Details tab, look for the process of the program for which you wish to change the priority.
- Right-click on the target procedure and from the driblet down menu, choose Prepare Priority.
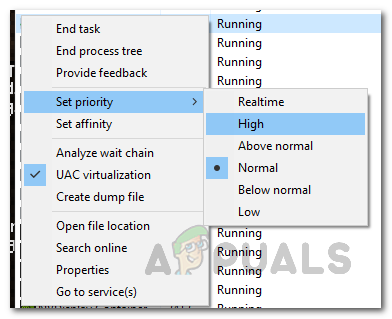
Changing Process Priority - On the follow upwards menu, lower the priority from what's already selected. A black dot is shown before the selected option.
- Once you lot have washed that, the priority of the program should be changed.
Change CPU Affinity
Some other thing that you tin do within the Task Director is irresolute the affinity of a procedure. When you do this, the procedure is restricted to using only selected cores and thus it is not able to utilize all of the cores of your processor. This can atomic number 82 to the freed upwards cores used by other processes or tasks and every bit such, the CPU usage of the program should decrease.
With that said, it is important to notation that this may not be effective against unmarried-threaded applications. This is considering single-threaded apps use only i core in the first place so limiting the number of cores bachelor to the process does non comport whatever fruit. Follow the instructions downwardly beneath to change the affinity of a process:
- To start off, open up up the Task Manager window again on your figurer by searching for it in the Start Carte.
Opening upwardly Task Manager - On the Task Director window, switch to the Details tab.
Task Managing director - There, look for the process of the plan so right-click on it.
- From the drop downward menu, choose the Set affinity option provided.
- On the follow up dialog box, change the number of cores the process has access to by unticking the checkboxes.

Changing Procedure Affinity - With that washed, click the OK button.
- You have successfully changed the affinity of the process. Remember that this is reset every time the app is restarted so you lot will have to practise it again once the process starts over.
Utilise Third Party Utility
Finally, another way using which you lot can limit the CPU usage of a programme is by using a third-party utility that is designed for handling the processes on your computer. Here, we will be using the Process Lasso app which is costless but yous can also opt to go for the premium version. However, for the mentioned purpose, the gratuitous version should exercise the task but fine.
As information technology turns out, using Procedure Lasso, you lot can perform the above methods equally well while likewise choosing to save the settings for the future. As such, when the app restarts, the same settings volition be practical again and so you won't take to open up up Task Manager every fourth dimension. In addition to that, Process Lasso comes with a CPU Limiter using which you tin can limit the CPU cores a procedure has admission to afterward it reaches a certain threshold. Let united states of america have a look at this in further item downwardly beneath:
- Start of all, go ahead and download Process Lasso from the official website by clicking here .
- Once you have installed Process Lasso, open it up.
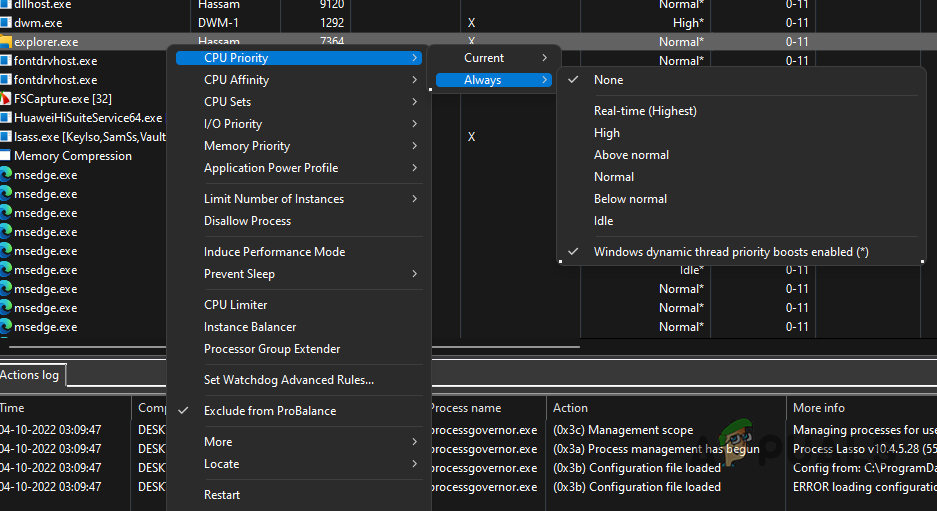
- With Process Lasso opened up, you will be able to run into a list of all the running processes. Right click on a process and yous will be able to alter the priority, analogousness and much more than. To change the mentioned options permanently, use the E'er option provided in the menu.
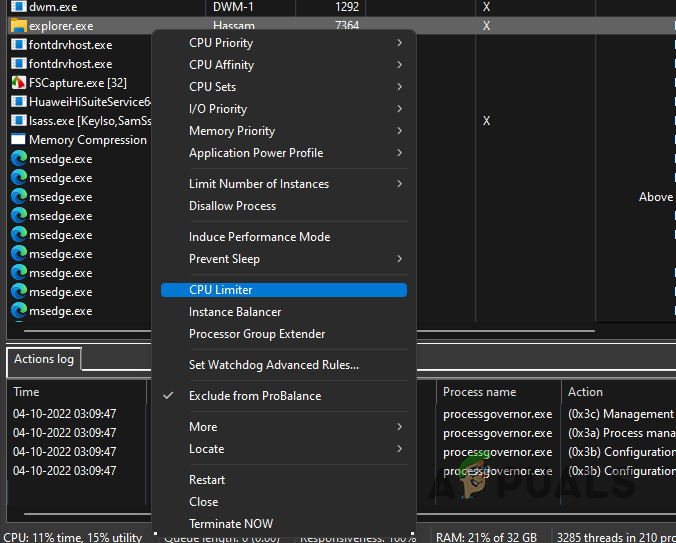
Irresolute Priority of Process using Process Lasso - To apply the CPU Limiter, right click on a procedure and choose the CPU Limiter selection.
Opening up CPU Limiter - On the follow up window, you will exist able to add a rule for when the CPU Limiter comes into activity.
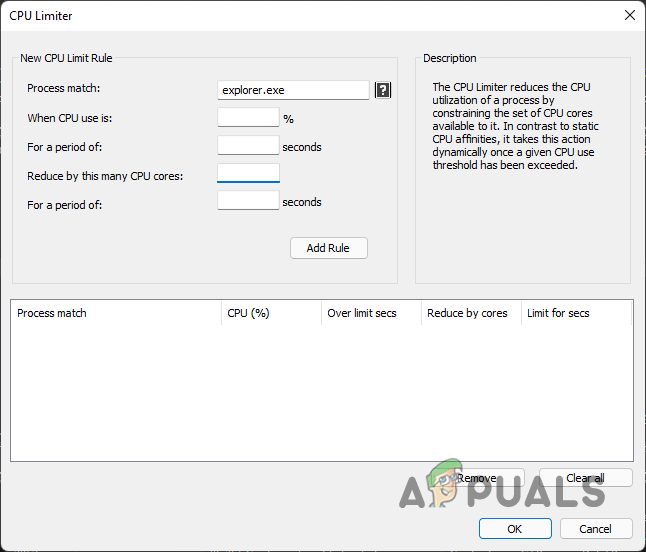
CPU Limiter - Here, decide on a certain percentage after a catamenia of seconds which activates the functionality of the CPU Limiter characteristic.
- Follow this up by providing how many CPU cores the process is reduced to and for how long.
- With that done, click the Add Dominion button. Finally, click OK and you should be skillful to go.
![]()
Source: https://appuals.com/limit-cpu-usage-program/
Posted by: dowellchader.blogspot.com
0 Response to "Windows 10 How To Limit Cpu Usage"
Post a Comment